
The Oster Roaster Oven is a versatile and efficient cooking appliance designed for roasting, baking, and slow cooking. It offers even heat distribution, self-basting lids, and a spacious interior, making it ideal for preparing delicious meals with ease.
1.1 Overview of the Oster Roaster Oven
The Oster Roaster Oven is a versatile countertop appliance designed for roasting, baking, and slow cooking. Known for its durability and performance, it features convection technology for even heat distribution and a self-basting lid to keep food moist. With a spacious interior, it accommodates large meals, making it perfect for families or gatherings. The oven allows for multiple cooking methods, including roasting, baking, and keeping food warm. Its user-friendly design and robust construction ensure long-lasting performance, while its sleek appearance complements any kitchen decor. This appliance is a practical choice for home cooks seeking convenience and versatility in meal preparation.
1.2 Importance of Reading the Instruction Manual
Reading the Oster Roaster Oven instruction manual is essential for understanding its features, operation, and maintenance. It provides critical safety guidelines, such as avoiding immersion of the oven body in water and not placing the removable roasting pan in the dishwasher. The manual also outlines proper preheating procedures, temperature control, and care tips to ensure longevity. By following the instructions, users can prevent accidents, optimize cooking results, and maintain the appliance’s performance. It serves as a comprehensive guide, ensuring safe and effective use of the oven while preserving its durability and functionality over time.

Safety Precautions
Always unplug the oven before cleaning and allow it to cool completely. Avoid immersing the oven body in water or placing the roasting pan in the dishwasher. Handle with care to prevent burns from residual heat, and use caution when opening the lid to avoid steam burns. Ensure the oven is placed on a heat-resistant surface and keep children away during operation. Follow all safety guidelines to prevent accidents and ensure safe, efficient use of your Oster Roaster Oven.
2.1 General Safety Tips
Always unplug the Oster Roaster Oven before cleaning and allow it to cool completely to avoid burns. Never submerge the oven body in water or place it in the dishwasher. Use oven mitts or tongs to handle hot cookware and ensure the oven is placed on a heat-resistant surface. Keep children away during operation and avoid touching the oven body immediately after cooking. Regularly inspect the power cord and plug for damage. Follow all safety precautions outlined in the manual to ensure safe and efficient use of your Oster Roaster Oven. Proper handling and care will extend the longevity of your appliance.
2.2 Specific Safety Precautions for the Oster Roaster Oven
Do not immerse the Oster Roaster Oven body in water or other liquids, as it may cause electrical damage. Only the removable roasting pan and rack should be washed by hand. Avoid using abrasive cleaners or scouring pads, as they can damage the oven’s finish. Always place the oven on a stable, heat-resistant surface. Use metal pans for better heat transfer, as glass or ceramic dishes may not conduct heat evenly. Never leave the oven unattended while in operation. Keep the oven out of reach of children and pets to prevent accidental burns or injuries. Always follow the manufacturer’s guidelines for safe operation.
2.3 Handling and Storage Safety
Allow the Oster Roaster Oven to cool completely before handling or cleaning to avoid burns. Always use oven mitts or tongs when removing hot pans or racks. Store the oven on a stable, heat-resistant surface, away from flammable materials. Ensure the cord is stored neatly to prevent tripping hazards. When not in use, the oven should be unplugged and kept in a dry, secure location. Avoid stacking heavy objects on the oven to maintain its structural integrity. Regularly inspect the power cord for damage and ensure all components are properly secured before and after storage.

Product Features
The Oster Roaster Oven features a self-basting lid, ensuring moist cooking results. With an 18-quart capacity, it accommodates large meals. Its even heat distribution guarantees consistent cooking, while the durable design ensures long-lasting performance.
3.1 Key Features of the Oster Roaster Oven
The Oster Roaster Oven boasts a range of key features that enhance cooking efficiency. Its self-basting lid ensures consistent moisture, while the 18-quart capacity accommodates large dishes. The oven is equipped with a temperature control system and a keep-warm setting, allowing for precise cooking and convenient meal management. Constructed with durable materials, it ensures long-term reliability. A removable roasting pan and rack simplify cleaning and food preparation. The oven’s compact design saves kitchen space without compromising on performance, making it a practical addition to any home kitchen.
3.2 Components of the Oster Roaster Oven
The Oster Roaster Oven includes a roaster oven body, a removable roasting pan, a roasting rack, and a self-basting lid. The oven body houses the heating elements and controls, while the roasting pan and rack are designed for easy food placement and removal. The self-basting lid ensures even moisture distribution during cooking. Additional components may include a temperature control knob and a power cord. These parts work together to provide efficient and versatile cooking options. The design emphasizes durability and ease of use, with features like cool-touch handles and a secure-fitting lid to enhance safety and convenience.
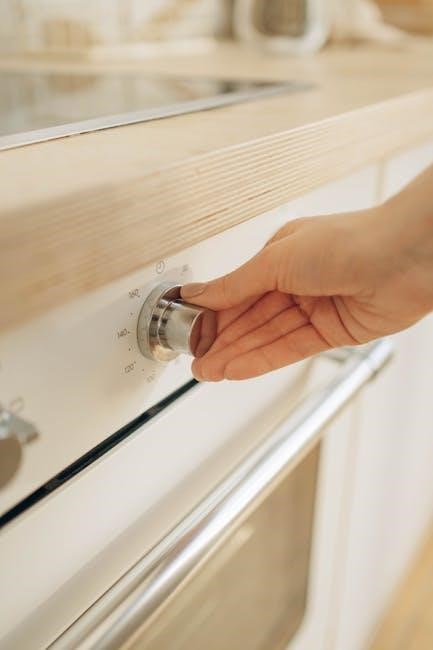
3.3 Control Panel Explanation
The control panel of the Oster Roaster Oven features a temperature control knob, allowing users to adjust heat settings between 150°F and 450°F. It also includes a timer button for setting cooking durations up to 24 hours. Additional buttons enable functions like turning the oven on/off and selecting specific cooking modes. The panel may include a digital display for easy monitoring of temperature and time. Indicator lights provide visual feedback for active settings. The intuitive design ensures seamless operation, allowing users to customize cooking preferences efficiently. This user-friendly interface makes it simple to achieve perfect results for a variety of recipes and cooking tasks.
Assembly and Initial Setup
Unpack and inspect the Oster Roaster Oven for damage. Position it on a stable, heat-resistant surface, ensuring proper ventilation. Plug in the oven, set the temperature control to the minimum position, and allow it to preheat for 30 minutes before first use.
4.1 Unpacking and Inspecting the Oven
When you receive your Oster Roaster Oven, carefully unpack it and inspect for any damage. Remove all packaging materials and ensure all components, including the roaster oven body, removable roasting pan, and lid, are included. Wash the removable parts with mild soap and warm water before first use. Place the oven on a stable, heat-resistant surface, ensuring proper ventilation. Plug the cord into a 120V AC outlet, ensuring it fits securely. Before turning it on, double-check that all parts are properly assembled and the oven is ready for use. Allow the oven to cool completely before handling after initial setup.
4.2 Positioning the Oven in the Kitchen
Position the Oster Roaster Oven on a stable, heat-resistant surface, such as a countertop or table. Ensure the area is clear of flammable materials and well-ventilated to avoid overheating. Place the oven at least 8 inches away from walls or other appliances for proper airflow. Avoid positioning it near water sources or where it may be exposed to moisture. Secure the power cord to prevent tripping hazards. Ensure the oven is placed on a level surface to maintain even heat distribution and optimal performance. This setup ensures safety and efficiency while cooking with your Oster Roaster Oven.
4.3 Initial Setup and Calibration
Before first use, ensure the Oster Roaster Oven is properly set up. Plug the oven into a 120V AC outlet and set the temperature control to the MIN position. Preheat the oven to 350°F for 30 minutes to allow it to reach optimal operating conditions. Place the removable roasting pan inside the oven body to ensure proper heat distribution. Check that the oven is on a level surface for even cooking. Allow the oven to cool completely before cleaning or further setup. This initial calibration ensures accurate temperature control and prepares the oven for safe and efficient cooking. Always follow the manual for specific calibration steps.
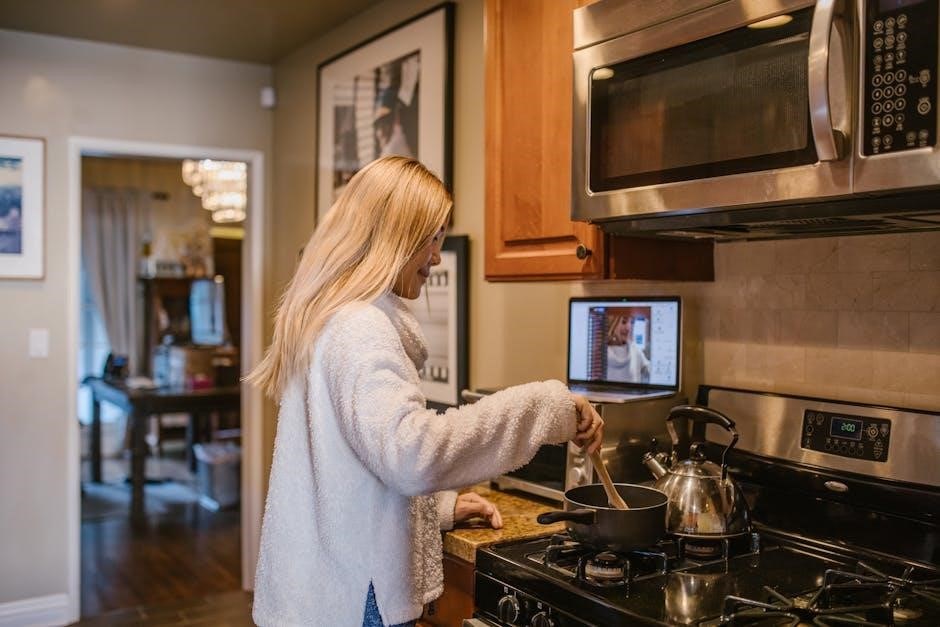
Operating the Oster Roaster Oven
To begin, preheat the Oster Roaster Oven to the desired temperature. Place food in the roasting pan, set the timer, and let the oven cook evenly.
5.1 Basic Usage Instructions
Start by preheating the Oster Roaster Oven to the desired temperature. Place food in the removable roasting pan and position it inside the oven; Use the temperature control knob to set your preferred heat level. For even cooking, ensure the food is centered and spaced properly. Plug in the oven, turn the dial to the selected temperature, and let it preheat for 15–20 minutes. Once preheated, place the food inside and set the timer if available. Use the self-basting lid to retain moisture and promote even browning. Always refer to the manual for specific temperature and time recommendations for different dishes.
5.2 Preheating the Oven
To preheat the Oster Roaster Oven, first ensure the removable roasting pan is in place. Turn the temperature control knob to the desired setting and plug in the oven. Allow it to preheat for 15–20 minutes. During preheating, avoid opening the lid to ensure even heat distribution. Once preheated, carefully place your food in the roasting pan and close the lid. Always refer to the manual for specific preheating times and temperatures for different types of food. Ensure the oven is preheated thoroughly before adding food for optimal cooking results. Use a thermometer to verify the internal temperature if needed.
5.3 Temperature Control and Settings
The Oster Roaster Oven features a temperature control knob that allows you to adjust heat settings from 150°F to 450°F. For optimal results, preheat the oven to the desired temperature before cooking. Use the control knob to select the appropriate setting based on your recipe. Ensure the oven is preheated thoroughly to maintain consistent heat. Always refer to the manual for recommended temperature settings for specific dishes. Proper temperature control ensures even cooking and prevents overheating. For added accuracy, consider using an oven thermometer to verify internal temperatures during cooking. Adjust settings as needed to achieve perfect results for roasting, baking, or slow cooking.
5.4 Using the Self-Basting Lid
The self-basting lid of the Oster Roaster Oven is designed to circulate moisture and flavor evenly over your food. To use it effectively, ensure the lid is properly seated on the roasting pan during cooking. Avoid opening the lid too frequently, as this can release steam and affect cooking results. For optimal performance, clean the lid regularly to remove food residue. The self-basting feature ensures tender and juicy dishes with minimal effort. Follow the manual’s guidelines for specific settings and techniques to maximize the benefits of this innovative feature during roasting or slow cooking.

Care and Cleaning
Regular cleaning ensures longevity. Wipe the exterior with a damp cloth and properly clean removable parts with soap. Avoid immersing the oven body in water.
6.1 Cleaning the Exterior
For the exterior, use a soft, damp cloth to wipe away splatters and stains. Avoid harsh chemicals or abrasive cleaners, as they may damage the finish. Mix a mild soap solution for tougher spots, but never immerse the oven body in water. Always unplug the oven before cleaning to ensure safety. Gently scrub any stubborn areas with a non-abrasive sponge. After cleaning, dry the exterior thoroughly with a clean towel to prevent water spots. Regular cleaning maintains the oven’s appearance and prevents grease buildup. For added protection, consider placing a trivet or hot pad under the oven to shield your countertop from heat damage.
6.2 Cleaning the Interior and Removable Parts
After unplugging and allowing the oven to cool, clean the interior with a damp cloth and mild soap. Avoid using abrasive cleaners or scrubbers, as they may damage the finish. For tough food residue, mix baking soda and water to form a paste, apply it to the area, and let it sit before wiping clean. Removable parts, such as the roasting pan and rack, should be washed with mild soap and warm water. Do not put them in the dishwasher. Dry all parts thoroughly after cleaning to prevent rust or water spots. Regular cleaning ensures optimal performance and longevity of your Oster Roaster Oven.
6.3 Maintenance Tips for Longevity
To ensure your Oster Roaster Oven lasts for years, regular maintenance is essential. Always unplug the oven before cleaning and avoid using abrasive cleaners or scouring pads, as they may damage the finish. After cleaning, dry all parts thoroughly to prevent rust. Store the oven in a dry place, away from direct sunlight, and ensure the cord is neatly wrapped. For tough stains, a mixture of baking soda and water can be applied and left overnight before wiping clean. Proper storage and handling will maintain its performance and extend its lifespan. Follow these tips to keep your Oster Roaster Oven in excellent condition for years of reliable use.
Troubleshooting Common Issues
Common issues with the Oster Roaster Oven include error codes, uneven heating, or malfunctioning parts. Refer to the manual for specific solutions or reset instructions to resolve problems effectively.
7.1 Common Problems and Solutions
Common issues with the Oster Roaster Oven include error codes, uneven heating, or the oven not turning on. For error codes, refer to the manual for specific meanings and solutions. If the oven doesn’t heat, ensure the temperature control is set correctly and the unit is plugged in. For uneven cooking, check if the rack is positioned properly and food is distributed evenly. Cleaning the oven regularly can prevent residue buildup, which may affect performance. Always unplug the oven before cleaning and allow it to cool completely to avoid burns or damage.
7.2 Error Codes and Their Meanings
The Oster Roaster Oven may display error codes such as E1, E2, or E3, which indicate specific issues. E1 typically signifies a temperature sensor malfunction, while E2 may point to a heating element problem. E3 could indicate a faulty control panel or incorrect settings. Refer to the user manual for detailed explanations of each code. If an error occurs, unplug the oven, allow it to cool, and restart. If the issue persists, contact customer support for further assistance. Regular maintenance and proper usage can help minimize errors and ensure optimal performance.
7.3 Resetting the Oven
To reset the Oster Roaster Oven, unplug it from the power source and allow it to cool completely. This process typically resolves minor glitches or error codes. After cooling, plug the oven back in and ensure all settings are restored to their default values. If the issue persists, refer to the troubleshooting section or contact customer support. Regularly resetting the oven after cleaning or maintenance can help maintain its performance and prevent operational errors. Always follow the manual’s guidance for a safe and effective reset process.
Recipes and Cooking Tips
The Oster Roaster Oven is perfect for crafting delicious roasts, casseroles, and slow-cooked meals. Its even heat distribution ensures perfectly cooked dishes every time, while the self-basting lid enhances flavor retention. Explore a variety of recipes, from hearty stews to golden-brown poultry, and use the oven’s versatility to create mouthwatering results with minimal effort.
8.1 Recommended Recipes for the Oster Roaster Oven
The Oster Roaster Oven excels at preparing a variety of delicious dishes, from hearty roasts to flavorful casseroles. Try classic recipes like roasted chicken with vegetables, slow-cooked pot roast, or tender pulled pork. The self-basting lid ensures moist results for dishes like beef brisket or herb-infused turkey. For sides, consider roasted root vegetables or golden-brown potatoes. The oven is also ideal for slow-cooking stews, chili, or braised short ribs. Experiment with seafood, such as garlic butter salmon, or vegetarian options like stuffed bell peppers. Its versatility makes it perfect for preparing a wide range of meals for any occasion.
8.2 Cooking Tips for Optimal Results
For best results with your Oster Roaster Oven, preheat it to the desired temperature before cooking. Always use metal pans for better heat distribution and avoid overcrowding the roasting pan. Baste meats periodically to enhance flavor and moisture retention. Cover dishes with aluminum foil if browning too quickly. Ensure the lid is securely closed during cooking to maintain even heat. Use a food thermometer to check internal temperatures for perfectly cooked meats. Allow roasted meats to rest for 10-15 minutes before serving to retain juiciness. Experiment with marinades and seasonings for added flavor.
8.3 Meal Planning Ideas
Plan hearty meals with your Oster Roaster Oven by exploring diverse recipes. Roast whole chickens with vegetables like carrots and potatoes for a classic dish. Prepare tender slow-cooked stews or braised meats for flavorful weeknight dinners. Use the oven for side dishes like roasted Brussels sprouts or sweet potatoes. Consider meal prepping by cooking large batches of grains or proteins. Experiment with seafood, such as baked salmon with lemon and herbs. For desserts, try roasting fruits like apples or pears with cinnamon for a sweet treat. The Oster Roaster Oven’s versatility makes it perfect for creating a variety of delicious, stress-free meals.

Warranty and Support
Your Oster Roaster Oven is backed by a limited one-year warranty covering manufacturing defects. For assistance, contact customer support at 1-800-334-0759 or visit www.oster.com.
9.1 Understanding the Warranty
Your Oster Roaster Oven is protected by a limited one-year warranty, covering manufacturing defects in materials and workmanship. This warranty applies to original purchasers and is non-transferable. It does not cover damage caused by misuse, neglect, or unauthorized modifications. To ensure warranty validity, register your product online or via mail within 30 days of purchase. For claims or inquiries, contact Oster’s customer support at 1-800-334-0759 or visit www.oster.com. Keep your proof of purchase handy for warranty service. Refer to the manual for full terms and conditions.
9.2 Contacting Customer Support
For assistance with your Oster Roaster Oven, visit www.oster.com to access customer support resources. Use the website to find contact forms, FAQs, and troubleshooting guides. You can also call Oster’s customer service at 1-800-334-0759 (USA) or 1-800-667-8623 (Canada) for direct support. For warranty-related inquiries or product registration, refer to the provided instructions in your manual. Ensure to have your product model number and purchase details ready when contacting support. Oster’s team is available to address your concerns and provide solutions to ensure optimal use of your appliance.
9.3 Registering Your Product
Registering your Oster Roaster Oven is a simple process that ensures you receive updates, warranty benefits, and enhanced customer support. Visit www.oster.com and navigate to the product registration section. Fill out the online form with your personal details, product model number, and purchase date. Ensure to have your purchase receipt or proof of purchase ready. Registration helps Oster provide tailored support and notifies you of any software updates or recalls. For assistance with registration, contact Oster’s customer service at 1-800-334-0759 (USA) or 1-800-667-8623 (Canada). Proper registration is key to maximizing your product’s warranty and support benefits.
The Oster Roaster Oven offers efficiency, versatility, and durability for home cooking. By following the manual, users can achieve optimal results and extend the product’s longevity. Register your oven and enjoy warranty benefits for a satisfying cooking experience.
10.1 Summary of Key Points
The Oster Roaster Oven is a versatile appliance designed for roasting, baking, and slow cooking. Key features include a self-basting lid, temperature control, and a spacious interior. Always preheat the oven before use, clean it after every use, and avoid immersing the body in water. Regular maintenance ensures longevity. Follow safety guidelines to prevent accidents; Use metal pans for better heat distribution and avoid dishwasher use for removable parts. Proper setup, care, and adherence to the manual ensure optimal performance and delicious results. Register your product for warranty benefits and enjoy a satisfying cooking experience with your Oster Roaster Oven.
10.2 Final Tips for Getting the Most Out of Your Oster Roaster Oven
Experiment with various recipes to maximize your oven’s potential. For optimal results, use metal pans for better heat distribution. Avoid dishwasher use for removable parts and clean the oven thoroughly after each use. Preheat the oven as instructed to ensure even cooking. Utilize the self-basting lid to maintain moisture and flavor. Store the oven in a dry place when not in use. Regularly inspect and clean the heating elements to maintain efficiency. Always follow the manual for troubleshooting and maintenance. By adhering to these tips, you can enjoy consistent performance and delicious meals with your Oster Roaster Oven.